TWICE AROUND ASCOT

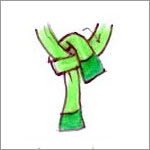
1.Fold the scarf according to the basic fold 1 and let it hang around your neck equally on each side.

4.Bring A towards the front

5.Let A pass through B again to form a knot
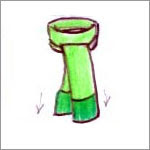
6.Adjust both the sides facing forward as shown in the illustration
SQUARE KNOT
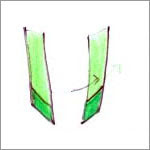
1.Begin with a bias-folded square scarf, or a narrowly folded oblong

2.Grasp the two ends and drape behind around neck so that one end hangs lower than the other

3.Cross long end over the short end. Bring it up through the loop created


4.Take the same end and wrap around behind short end. Pull long end across and insert horizontally through the knot created, forming a square


1.Adjust so that the square knot is centered directly underneath chin

2.Cross over both the sides

3.Give the sides another cross
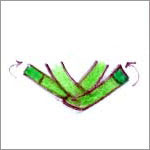
4.Bring both the ends towards the back of the neck
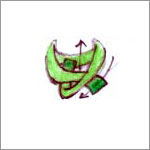
5.Bring both the ends towards the back of the neck

6. This is the know at the back of the neck

7.The front of the neck will look like this

1.The front of the neck will look like this

2.Place the scarf around your neck; situating it so that one end is about two inches longer (A) than the other end (B)

3.Cross A over B and let it pass through B so that a sort of hoop is formed

4.Let A pass through it again and bring it down facing forward

5.Adjust your scarf by straightening the front part (A).

6.Your Hollywood knot is ready
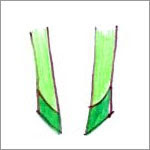
1.Fold the scarf according to basic knot 1 and let it drop down your neck equally on each side.

2.Make a knot on one side (A).

3.Bring the other side (B) towards A
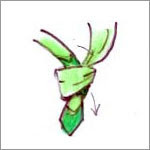
4.Let B pass through A to form a knot

5.Tighten the knot to get a beautiful fake knot

6.Adjust so that the square knot is centered directly underneath chin
NECK WRAP

1.Adjust so that the square knot is centered directly underneath chin

2.Cross over both the sides

3.Give the sides another cross

4.Bring both the ends towards the back of the neck

5.Bring both the ends towards the back of the neck

6. This is the know at the back of the neck

7.The front of the neck will look like this
HOLLYWOOD KNOT

1.The front of the neck will look like this

2.Place the scarf around your neck; situating it so that one end is about two inches longer (A) than the other end (B)

3.Cross A over B and let it pass through B so that a sort of hoop is formed

4.Let A pass through it again and bring it down facing forward

5.Adjust your scarf by straightening the front part (A).

6.Your Hollywood knot is ready
FAKE KNOT

1.Fold the scarf according to basic knot 1 and let it drop down your neck equally on each side.

2.Make a knot on one side (A).

3.Bring the other side (B) towards A

4.Let B pass through A to form a knot

5.Tighten the knot to get a beautiful fake knot
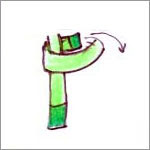
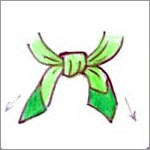
EUROPEAN LOOP






No comments:
Post a Comment